

KineMaster – Video Editor
How to Download KineMaster – Video Editor in 2025
Whether you’re a beginner content creator or a mobile editing wizard, KineMaster remains one of the most powerful video editing apps out there. If you’re ready to level up your social media game or polish your next vlog, here’s a stylish and straight-to-the-point guide to help you download KineMaster on any device — uniquely written for modern users like you.
Unlocking the Power of KineMaster – Video Editor for Your Projects
For an enhanced experience, consider using KineMaster – Video Editor for all your video editing projects, as it offers unparalleled flexibility and features.
🌟 Why KineMaster?
Before we dive into downloads, let’s answer the “why”:
🎬 Mastering Edits with KineMaster – Video Editor
- 🎥 Pro tools on mobile – Multi-layer editing, keyframe animation, chroma key, speed control.
- 🧠 AI Features – Auto-captions, voice filters, smart trimming.
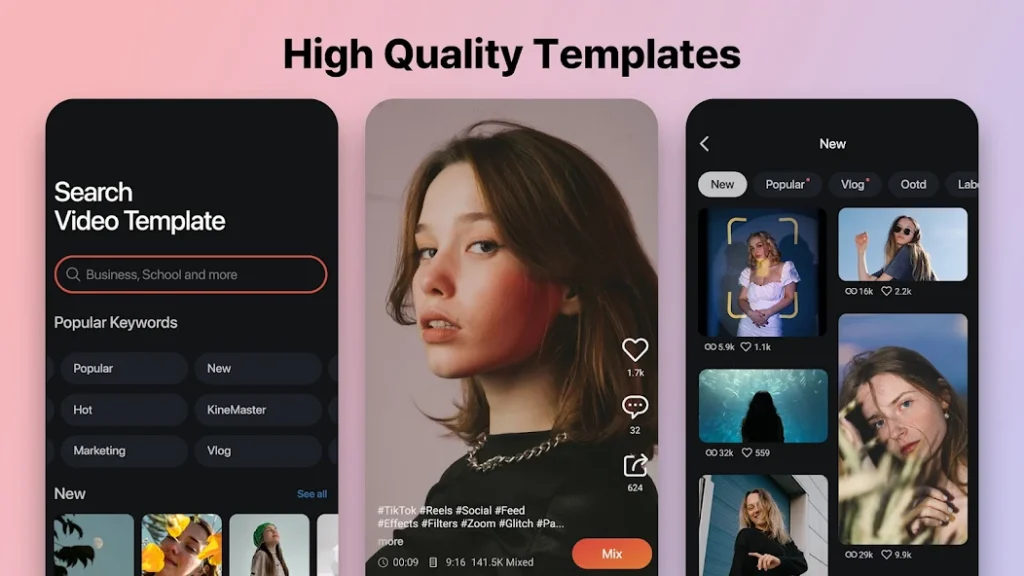
- 💡 Creative Assets – In-app store with thousands of templates, transitions, music, and effects.
It’s not just an app — it’s your mobile studio.
📲 How to Download KineMaster – Step-by-Step
📱 For Android Users (Smartphones & Tablets)
- 🔍 Open the Google Play Store.
- 🆎 Type KineMaster – Video Editor in the search bar.
- ✅ Tap on the app developed by KineMaster, Video Editor Experts Group.
- 📥 Hit Install and wait a few seconds.
- 🚀 Launch and start creating!
💡 Pro Tip: For watermark-free exports and full access to premium assets, explore KineMaster Premium inside the app.

🍏 For iOS Users (iPhone or iPad)
- 📱 Open the App Store.
- 🔍 Search for “KineMaster” by KineMaster Corporation.
- 📲 Tap Get to begin the download.
- 🔓 Open the app and give permissions.
- 🎬 You’re ready to edit in style!
💻 Want KineMaster on PC or Mac?
KineMaster isn’t natively built for desktops, but here’s a creative workaround:
- 💽 Download an Android emulator like BlueStacks.
- 🎮 Launch BlueStacks and log into your Google Account.
- 🔍 Open the Play Store inside BlueStacks and install KineMaster.
- 🖥️ Now you can run KineMaster on your computer just like on your phone.
🖌️ Editing on a big screen? Yes, please.
🌐 Download From Trusted Sources
| Platform | Link |
|---|---|
| Google Play Store | Download here |
| Apple App Store | Download here |
| Official Website | Visit KineMaster |
How to Use KineMaster – Video Editor Like a Pro (2025 Stylish Guide)
✨ Whether you’re a content creator, a short film maker, or just love editing reels, KineMaster – Video Editor is your all-in-one video studio — right inside your phone. But the real magic? Knowing how to use KineMaster – Video Editor like a pro.
In this modern guide, we’ll walk you through how to use KineMaster, step by step, with tips, secrets, and style!
🛠️ What is KineMaster?
KineMaster is a full-featured mobile video editor designed for Android, iPhone, and even PC (via emulator). It’s known for:
- 🎞️ Multi-layer timeline
- 🔥 Green screen (Chroma Key)
- 🎵 Royalty-free music & sound effects
- 💥 Transitions, overlays, text animations
- 🤖 AI-powered tools like background remover, voice changer, and auto subtitles
🚀 Getting Started: KineMaster Interface Explained
Once you open the app, here’s what you’ll see:
| Section | What It Does |
|---|---|
| Media Panel | Import videos, images, and audio |
| Timeline | Arrange clips, layers, transitions |
| Layer Tool | Add text, stickers, effects |
| Audio Tool | Add music, voiceover, or SFX |
| Export | Save your project in 720p, 1080p, or 4K |
🎯 Pro Tip: Tap the “+” to start a new project. Choose your aspect ratio:
- 9:16 for TikTok/Reels
- 16:9 for YouTube
- 1:1 for Instagram
✂️ How to Edit a Video in KineMaster – Step-by-Step
🖼️ Step 1: Import Your Footage
- Tap Media and select your video clips or photos.
- Drag them to the timeline.
✏️ Step 2: Trim & Cut
- Tap a clip in the timeline.
- Use the scissors tool to cut, split, or trim unwanted parts.
🎵 Step 3: Add Music or Voice
Additionally, KineMaster – Video Editor provides users with a platform to share their creativity effortlessly.
- Go to Audio, then:
- Choose a track from the Asset Store (some are free!)
- Record your voice with the Voice Tool
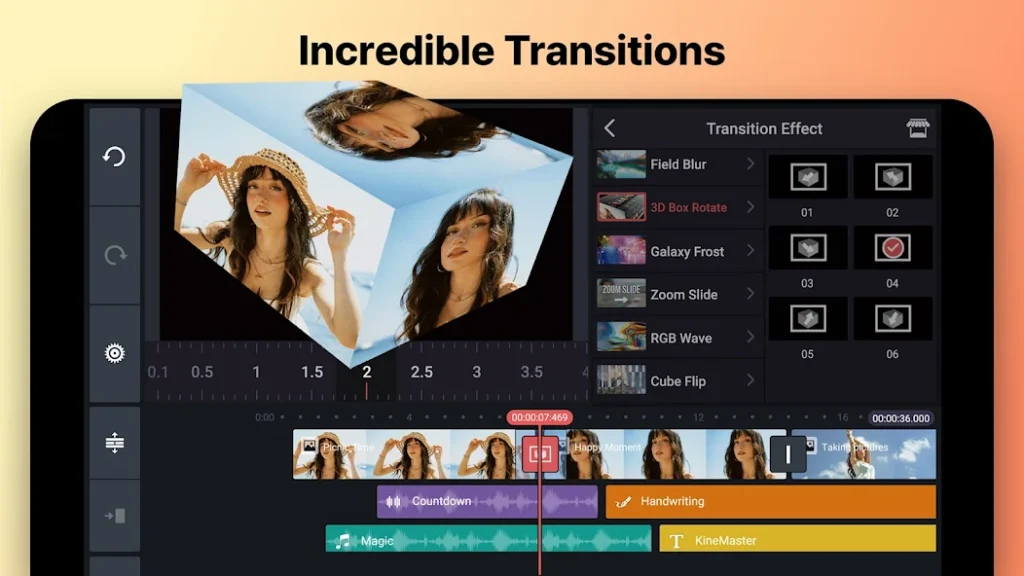
🌈 Step 4: Use Filters, Transitions & Effects
- Tap Layer → Effect to add glitch, blur, or other effects.
- Use Transition between clips to smooth the scene changes.
- Add text animations and choose from stylish fonts.
🟢 Step 5: Use the Green Screen Tool
- Import a green screen clip.
- Tap it → Enable Chroma Key
- Adjust the strength for a clean keying effect.
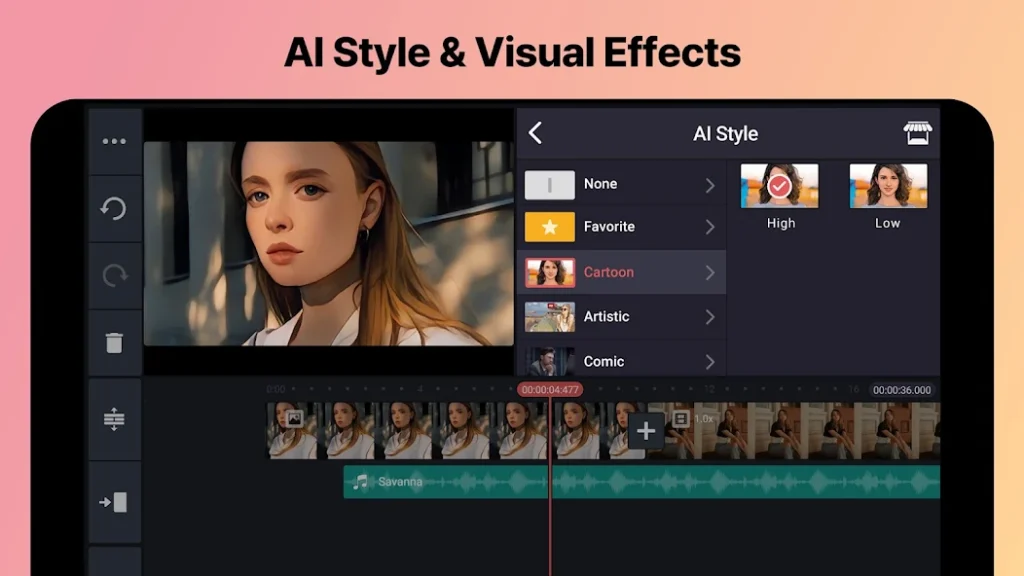
🧙 Step 6: Use AI Features (New!)
- Auto Subtitles: Let KineMaster auto-generate captions.
- Background Remover: Instantly remove the background from a video (no green screen needed).
- Voice Changer: Convert your voice to robot, deep, or funny tones.
With KineMaster – Video Editor, you can achieve professional-quality edits quickly and easily.
📤 Step 7: Export and Share
- Tap Export (top-right)
- Choose resolution (720p, 1080p, or 4K)
- Option to remove watermark with Premium
Advanced KineMaster Tricks to Level Up Your Editing
If you’ve mastered the basics, here’s where it gets fun. Let’s dive deeper into the creative side of KineMaster.
🎚️ 1. Use Keyframe Animation Like a Pro
Keyframes = smooth motion.
- Tap on any clip, text, or layer
- Tap the keyframe diamond icon
- Set start and end positions (e.g., move left to right, zoom in, rotate)
- Preview = buttery-smooth animations!
Perfect for: Logo reveals, dynamic text, cinematic B-roll
🔈 2. Create Audio Transitions (Fade In/Out)
Sound design = emotion.
- Tap your audio clip
- Use the fade in/out sliders to make smooth sound transitions
- Adjust volume per frame for music ducking during voiceovers
Pro tip: Use dramatic pauses + soft background music for storytime edits.
🎭 3. Blend Modes for Cinematic Effects
Want a Hollywood-style video?
- Tap a clip → Select Blending Mode
- Try: Multiply, Overlay, Screen, Add
- Layer textures like dust, light leaks, fire, or lens flares on top of your footage
Result? Instant cinematic vibes.
📱 4. Use Vertical + Horizontal Project Hacks
Depending on platform:
| Platform | Best Aspect Ratio |
|---|---|
| TikTok, Reels | 9:16 (Vertical) |
| YouTube Shorts | 9:16 |
| YouTube (main) | 16:9 (Horizontal) |
| 1:1 or 4:5 |
Bonus: You can switch the aspect ratio anytime by going to Project Settings → Aspect Ratio.
💼 5. Save Presets for Faster Edits
- Reuse favorite animations or transitions
- Save custom title designs as projects and duplicate them
- Organize templates in folders using file managers
Create once, use forever.
Discover the endless possibilities with KineMaster – Video Editor and take your videos to new heights.
Explore the advanced capabilities of KineMaster – Video Editor that can elevate your editing skills and output quality.